
Table of Contents
- Tools Needed for Concrete Sleeper Installation
- Site Preparation and Setting Out Your Wall Line
- How Deep to Bury Retaining Wall Posts
- Installing Steel Posts and Pouring Concrete Footings
- Stacking Sleepers and Securing the Wall
- Concrete Sleeper Retaining Wall Drainage Requirements
- Maintaining Concrete Landscape Products in Coastal Areas
- Troubleshooting Common Installation Errors
- Frequently Asked Questions
Last Updated: September 20, 2026
Tools Needed for Concrete Sleeper Installation
Learning how to install concrete sleepers starts with the right kit, to install concrete sleepers, missing tools cost more time than any other mistake on site.
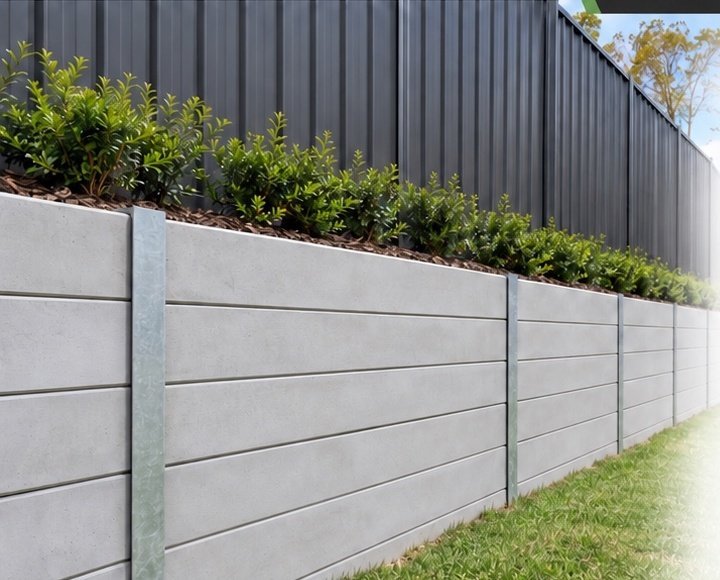
Retain The Earth manufactures concrete retaining wall sleepers in Adelaide using 60 MPa concrete to AS 3600 Australian Standards, with reinforced sleepers available in standard grey Portland and smooth charcoal Blackwater finishes. We also supply galvanised retaining steel direct to contractors, landscapers, builders and homeowners. Here is what you need before you break ground:
- Post hole digger or auger
- Spirit level (1.2m minimum) for plumb checks
- String line and stakes for horizontal alignment
- Wheelbarrow and mixing tubs for concrete
- Appropriate lifting equipment for the sleeper weight and site access
- PPE: safety goggles, work gloves, steel-capped boots
Prepare the post holes and footings to the project design. Backfill and compaction methods also need to match the specified wall system.
Site Preparation and Setting Out Your Wall Line
Site prep decides how well the wall performs for the next 30 years, get it wrong and no concrete will save the job.
Excavation and Trenching for the Wall Base
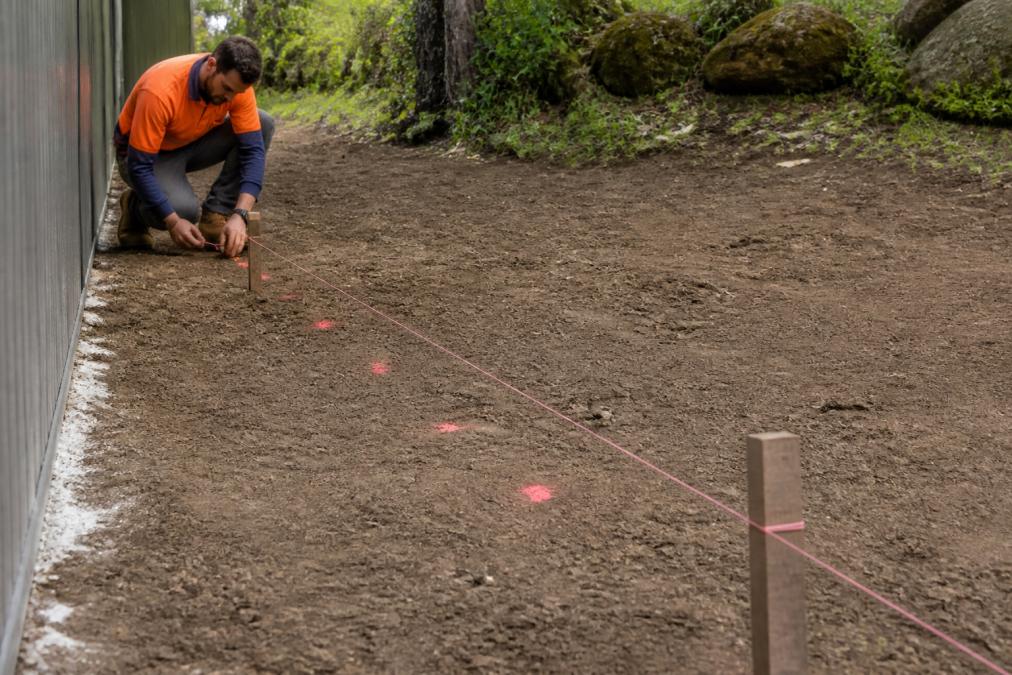
Clear and mark the wall line, then excavate the post holes and any base preparation shown on the project drawings. For walls over 1 m, seek independent advice for the actual site conditions; approval requirements can also depend on location and nearby loads. Soil conditions, including reactive clay or fill, affect the design.
Marking Post Positions and String Line Setup
Set your string line before you dig a single hole, this prevents the most common DIY error: posts drifting out of alignment.
- Mark post centres to suit the actual sleeper length, steel profile and project design, allowing the specified clearance for the system
- Run a taut string line along the wall face
- Check square using the 3-4-5 triangle method
- Mark each hole with spray paint
How Deep to Bury Retaining Wall Posts
Follow the site-specific engineering drawings for post embedment, footing size, steel section and construction details whenever a design is provided. There is no single depth that suits every retaining wall.
Where a site-specific engineered depth has not been provided, Retain The Earth’s preliminary planning guide is to allow post embedment below the lower finished ground level equal to the exposed wall height plus 200 mm. For example, a wall 1,000 mm above the lower ground level would be estimated with 1,200 mm of post embedment. This helps with initial planning; it does not establish that the wall is safe to build without engineering or approval.
When You Need Council Approval and an Engineer
Requirements depend on the site and the wall’s relationship to boundaries, fences, slopes and nearby structures. Before work begins, use PlanSA’s approval checker and ask a qualified designer or engineer when the site conditions call for one. An apparently low wall can still carry substantial loads.
Soil Classification Drives Embedment Depth
Ground conditions affect the footing design and the depth needed to support the posts. Reactive clay, fill, soft ground and changing moisture conditions can alter the design. Do not treat the preliminary height-plus-200-mm estimate as a substitute for site assessment.
Surcharge Loads Change Everything
Driveways, buildings, fences, sloping ground and stored materials near the top of a wall may add loads. The engineer’s design must account for the actual conditions behind and around the wall.
Concrete Footing Depth and Steel Post Embedment
Post embedment, hole diameter, concrete footing, post section and drainage work together. Use the specified design for the site; confirm those details before ordering steel or starting excavation.
Installing Steel Posts and Pouring Concrete Footings
Steel posts carry the load, get them plumb and the rest falls into place.
Mixing and Pouring Concrete for Post Footings
Use the concrete grade, pier dimensions, steel placement and cover specified by the engineer or applicable system design. Set the galvanised posts plumb and at the required centres, brace them securely, then pour and finish the footings as specified. Keep the concrete below the seating level of the bottom sleeper where the design requires it, and allow the specified curing time before inserting sleepers or backfilling.
See our galvanised retaining steel →
Levelling and Alignment Techniques
Check plumb on two faces of every post, one that looks straight from the front can lean sideways.
- Use a spirit level on the face and the side
- Re-check against the string line after each pour
- Adjust braces before the concrete sets
- Record any post out of vertical tolerance and fix it immediately
Stacking Sleepers and Securing the Wall
Once the footings have reached the specified cure, plan the lift for the actual sleeper weight, access and equipment. Check the product information before handling.
Installing the First Sleeper and Building Up
The first sleeper sets the level for the whole wall. Slide it into the steel posts, check it sits level, then lock it in place. Use spacers to keep gaps even, and work upward one course at a time, checking horizontal alignment as you go.
Step | What to Check | Common Error |
|---|---|---|
First sleeper | Level and seated in posts | Forcing it, cracking the edge |
Middle courses | Even spacer gaps | Uneven spacing, crooked look |
Safe Handling and Lifting of Concrete Sleepers
Concrete sleepers are heavy and can crush fingers or feet. Plan the lift for the product weight and use rated mechanical aids and competent operators where needed. Keep hands clear of the steel channels as each sleeper is lowered. Follow the applicable work health and safety procedures and the equipment manufacturer’s instructions.
Spacers, Alignment and Course Control
Spacers keep gaps even and stop sleepers shifting. Use consistent spacer thickness across the whole wall, mixed sizes create a crooked look no capping will hide.
Concrete Sleeper Retaining Wall Drainage Requirements
Drainage is where most retaining walls fail: water builds up behind the wall, adds soil pressure and pushes the structure forward.
For the illustrated build sequence, drainage diagram and maintenance advice, see our Installation & Care Guide.
Drain, Backfill and Outlet
Provide a continuous drainage path behind the wall using the membrane or separation layer, drain and free-draining material specified for the design. The drain needs a suitable outlet so collected water can leave the wall. The size and extent of the drainage zone, backfill material and compaction limits depend on the project details; do not assume a fixed 300 mm gravel height is adequate.
Protect the drain from blockage during backfilling, and avoid heavy equipment or surcharge loads near the wall unless the design allows them. Record the drainage route and outlet before covering the work.
Maintaining Concrete Landscape Products in Coastal Areas
Coastal sites punish concrete harder than inland ones. Salt spray, wind-driven sand and constant moisture all speed up wear.
Troubleshooting Common Installation Errors
Movement, cracking, blocked outlets and misaligned posts call for assessment before adding load or attempting a repair. The visible symptom alone does not identify the cause. Ask a suitably qualified installer or engineer to inspect the wall and its drainage, footing and backfill details.
Frequently Asked Questions
Need concrete sleepers and retaining steel for your project?
Contact Retain The Earth for product pricing, trade pricing and delivery throughout Adelaide and South Australia.
Recent Comments